
Introduction
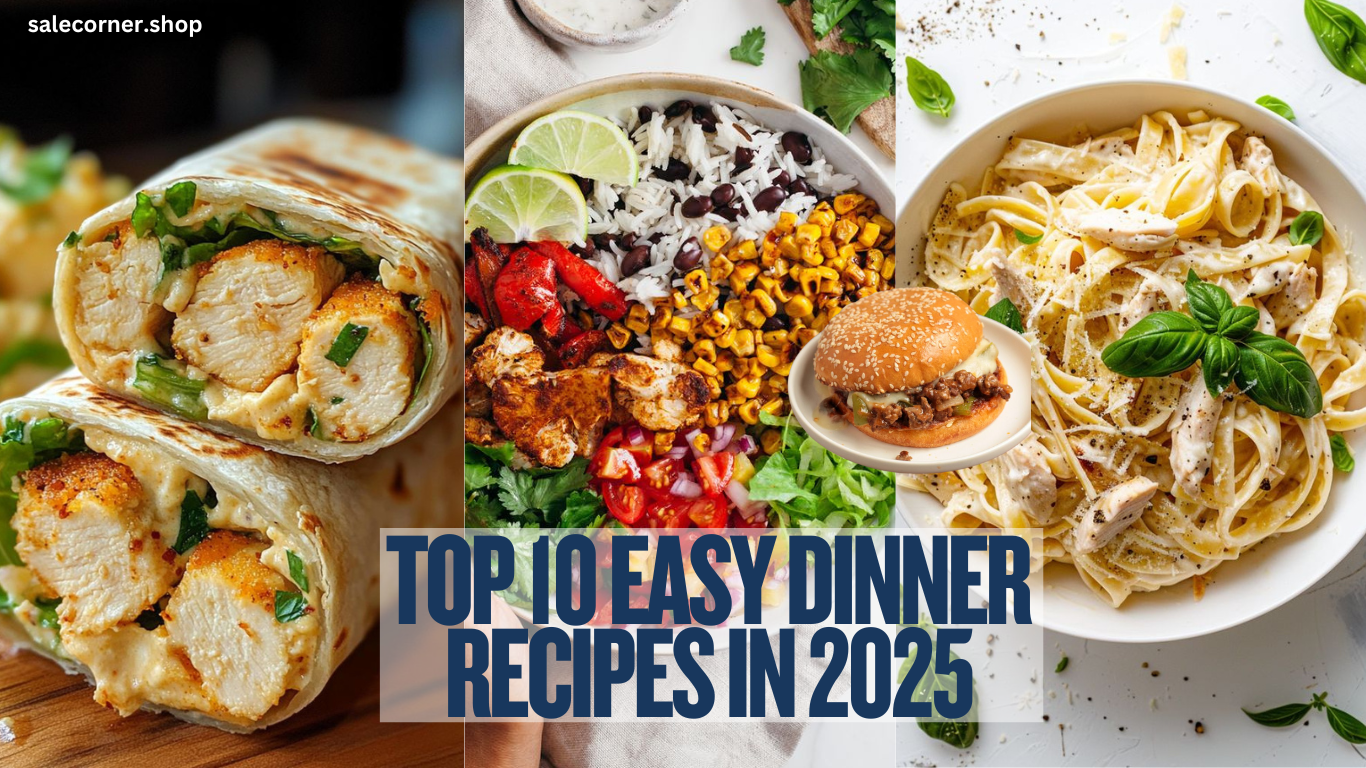
Welcome, future chefs! Have you ever come home after a long day at school or work, stomach rumbling and the fridge looking more like an empty treasure chest than a pantry full of possibilities? Or perhaps you’ve dreamed about surprising your family with a tasty meal but felt unsure where to begin. Well, today is your lucky day! In this post, we’re exploring 10 easy dinner recipes that are perfect for busy American households. These recipes are quick, straightforward, and bursting with flavor—ideal for transforming dinner into the best part of your day.
Cooking at home is more than just preparing food; it’s a chance to build new skills, bond with loved ones, and even create lasting memories. Research shows that families who cook together enjoy not only healthier meals but also more laughter and stronger relationships. In fact, the USDA points out that home-cooked meals can save both time and money, reducing everyday stress. Moreover, nutrition experts have found that when kids help in the kitchen, they tend to eat up to 50% more vegetables!
In this blog post, we’ll guide you through 10 easy dinner recipes, complete with useful tips and detailed instructions. Whether you’re a cooking beginner or a parent searching for fresh meal ideas, these recipes are made for you. So, roll up your sleeves, grab your apron, and get ready to become the hero of your own kitchen!
Why Easy Dinner Recipes Matter
In today’s fast-paced world, preparing a nutritious and delicious dinner can seem like a daunting task. Here’s why these easy recipes can make all the difference:
- Time Efficiency: On average, an American family spends about 45 minutes preparing dinner (USDA). Our recipes are designed to be ready in 30 minutes or less, leaving you extra time to relax and enjoy your evening.
- Health Advantages: Studies from the Journal of Nutrition Education reveal that children involved in cooking tend to consume up to 50% more vegetables. Home-cooked meals also often have less sodium and unhealthy fats than dining out.
- Budget-Friendly: Forbes reports that cooking at home can save families up to $250 each month compared to restaurant meals. Plus, you can often repurpose leftovers into new, exciting dishes!
- Skill Building: Every recipe is a learning opportunity—from mastering basic knife skills to understanding flavor combinations. With each dish you prepare, you build confidence and expand your culinary repertoire.
With all these benefits, it’s clear that mastering a few simple dinner recipes can positively impact your health, budget, and family life.
10 Easy Dinner Recipes
We’ve organized these recipes into five convenient categories so you can easily pick the perfect meal for any occasion. Each recipe comes with clear instructions, practical tips, and insights to ensure your cooking experience is smooth and fun. Let’s dive in!
Category 1: Quick & Kid-Friendly Dinners
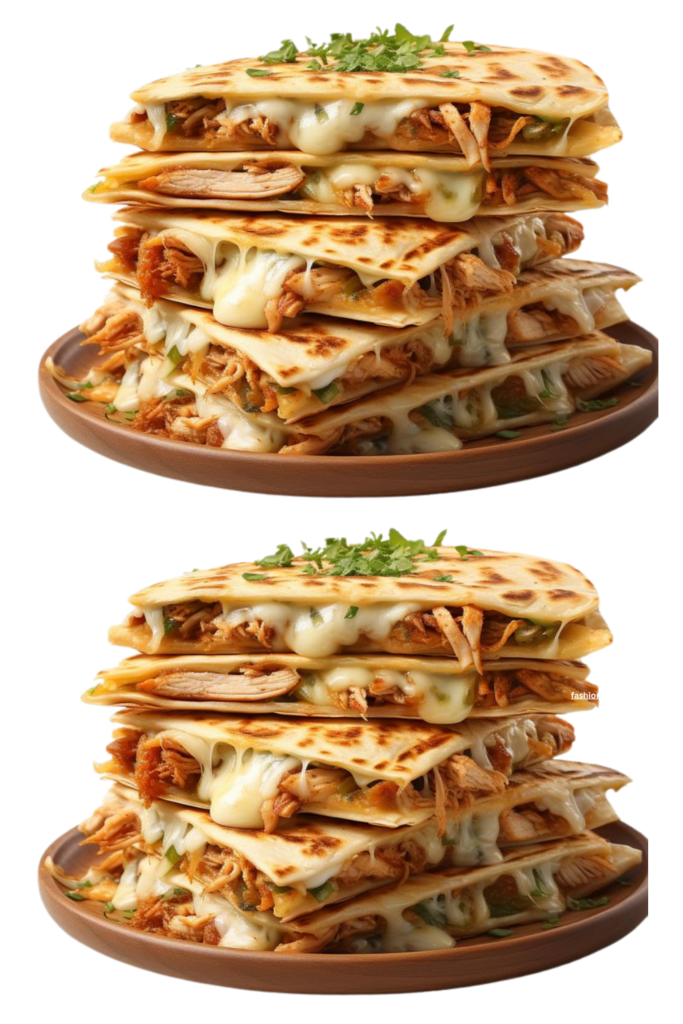
1. Cheesy Chicken Quesadillas
What Makes Cheesy Chicken Quesadillas So Special?
Cheesy chicken quesadillas are more than just a quick meal—they’re a blank canvas for your culinary creativity. Here’s why they’re such a crowd-pleaser:
- Quick and Simple: With just a few basic ingredients and straightforward steps, you can whip up this meal in under 20 minutes.
- Kid-Approved: The classic combo of chicken and cheese is always a hit with kids, and it’s a fantastic way to get them involved in the kitchen.
- Adaptable: Whether you crave an extra crunch from corn or a burst of flavor from black beans, you can easily tweak the recipe to fit your taste.
- Cost-Effective: Relying on common pantry items and affordable proteins, this recipe is gentle on your wallet.
Ingredients
To prepare these delicious cheesy chicken quesadillas, you’ll need:
- 2 cups cooked, shredded chicken: Use leftovers or freshly cooked chicken breasts.
- 1-2 cups shredded cheese: Cheddar, Monterey Jack, or a combination works wonderfully.
- 4 large flour tortillas: Alternatively, opt for whole-wheat tortillas for a healthier twist.
- 1/2 cup corn kernels (optional): Choose fresh, frozen, or canned.
- 1/2 cup black beans (optional): Make sure they’re rinsed and drained.
- Salt and pepper: To taste.
- Olive oil or butter: For toasting the quesadillas.
- Salsa or guacamole: For serving as a tasty dip.
Step-by-Step Instructions
1. Prepare the Filling:
In a bowl, combine the shredded chicken with a pinch of salt and pepper. If you’re adding corn or black beans, mix them in gently so that all the ingredients are well incorporated.
2. Assemble the Tortilla:
Lay a tortilla flat on a clean surface. On one half, evenly sprinkle a layer of shredded cheese. Then, add a generous portion of the chicken mixture on top of the cheese. For an extra cheesy treat, sprinkle a little more cheese over the chicken.
3. Fold and Seal:
Carefully fold the tortilla in half, ensuring the filling is completely enclosed. Press lightly with your hand so the melted cheese helps to seal everything together.
4. Toast the Quesadilla:
Heat a non-stick skillet over medium heat and add a small drizzle of olive oil or a pat of butter. Place the folded quesadilla in the skillet and cook for about 2-3 minutes per side, or until the tortilla turns golden brown and crispy while the cheese inside melts perfectly.
5. Slice and Serve:
Once done, remove the quesadilla from the skillet and allow it to cool for a minute. Then, cut it into wedges using a sharp knife or pizza cutter. Serve warm with your favorite dipping sauce such as salsa or guacamole.
Tips & Variations
- Extra Crunch: Try adding sautéed bell peppers or onions with the chicken for an added texture.
- Spice It Up: For a little extra kick, incorporate a dash of cumin or a sprinkle of chili powder into the chicken mixture.
- Veggie Boost: Mix in some chopped spinach or diced tomatoes if you want to sneak more veggies into your dish.
- Cheese Choices: Experiment with different cheeses—a slice of Pepper Jack can add a spicy twist, while a blend of cheddar and mozzarella delivers a perfectly melty texture.
- Make-Ahead Option: Prepare the chicken filling in advance and store it in the refrigerator. When you’re ready to eat, simply assemble and toast your quesadillas.
Serving Suggestions
Cheesy chicken quesadillas are incredibly versatile and pair wonderfully with a variety of sides. Consider serving them with:
- Fresh Salsa: A zesty tomato salsa or even a sweet pineapple salsa can add a refreshing burst of flavor.
- Guacamole: Creamy avocado guacamole complements the crispy texture of the quesadillas beautifully.
- A Green Salad: A light, crisp salad offers a refreshing counterbalance to the rich flavors.
- Mexican Rice: For a heartier meal, serve your quesadillas with a side of flavorful Mexican-style rice.
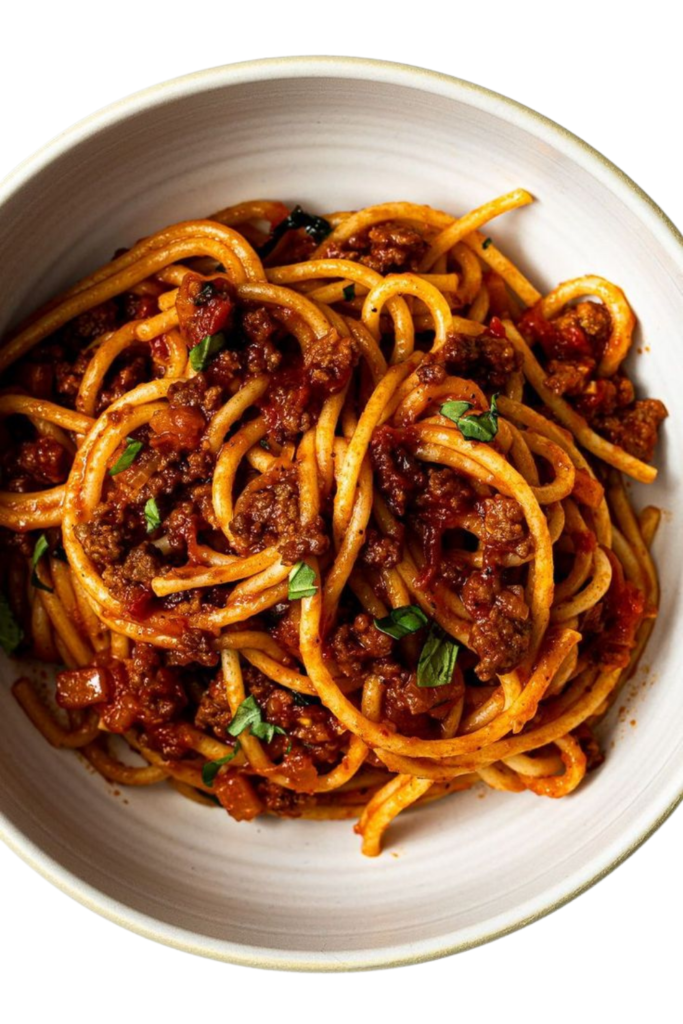
2. Spaghetti with Meat Sauce
A Timeless Comfort Classic
Spaghetti with Meat Sauce is the kind of dish that fills both your heart and your belly with its warm, familiar flavors. This classic meal is perfect for hectic weeknights or cozy family dinners, combining perfectly cooked pasta with a hearty, savory meat sauce. Here’s why this dish has been a beloved favorite for generations:
- Hearty and Satisfying: Enjoy the robust flavors of a slowly simmered meat sauce paired with tender spaghetti—a true comfort food experience.
- Simple to Prepare: With a handful of basic ingredients and clear, straightforward steps, you can have a delicious dinner on the table in less than 30 minutes.
- Family-Friendly: Its timeless taste appeals to both young and old, making it an ideal recipe for family meals.
- Budget-Conscious: Using economical ingredients like ground beef, canned tomatoes, and dried herbs, this dish delivers big on flavor without straining your wallet.
Ingredients
Gather these ingredients to create your spaghetti with meat sauce:
- 1 pound spaghetti: Choose your favorite brand or style.
- 1 pound ground beef: Ground turkey or a mix of both works well too.
- 1 medium onion, finely chopped: Adds a subtle sweetness to your sauce.
- 3 cloves garlic, minced: Provides a savory burst of flavor.
- 1 can (28 ounces) crushed tomatoes: Forms the rich base of the sauce.
- 1 can (14 ounces) diced tomatoes (optional): For additional texture and freshness.
- 2 tablespoons tomato paste: Deepens the overall flavor.
- 1 teaspoon dried basil: A staple herb that enhances the Italian essence.
- 1 teaspoon dried oregano: Pairs beautifully with basil to create an aromatic blend.
- Salt and pepper, to taste: For essential seasoning.
- Olive oil: Used for sautéing the onions and garlic.
- Red pepper flakes (optional): Adds a hint of heat.
- Grated Parmesan cheese: For a delicious finishing touch.
- Fresh basil leaves (optional): For garnish and an extra pop of freshness.
Step-by-Step Instructions
1. Cook the Spaghetti:
Fill a large pot with salted water and bring it to a boil. Add the spaghetti and cook it according to the package directions until al dente. Drain the pasta, reserving about 1/2 cup of the cooking water, and set aside.
2. Sauté the Aromatics:
In a large skillet or saucepan, heat a couple of tablespoons of olive oil over medium heat. Add the chopped onion and cook until it turns soft and translucent—this should take about 3-4 minutes. Then add the minced garlic and sauté for an additional 1-2 minutes until fragrant.
3. Brown the Meat:
Add the ground beef to the skillet. Use a spoon to break it apart as it cooks, ensuring it browns evenly and is fully cooked through. If there’s excess fat, drain it off as needed.
4. Build the Sauce:
Mix in the tomato paste and let it cook with the meat for around 1 minute. Then, pour in the crushed tomatoes (and diced tomatoes, if using). Stir in the dried basil, dried oregano, and season with salt, pepper, and red pepper flakes if you enjoy a bit of heat. Allow the mixture to come to a gentle simmer.
5. Simmer and Adjust Consistency:
Keep the sauce simmering on low heat for 10-15 minutes so the flavors meld together beautifully. If the sauce appears too thick, add a splash of the reserved pasta water until you achieve your desired consistency.
6. Combine and Serve:
Toss the cooked spaghetti into the sauce, making sure every strand is coated with the rich, flavorful meat sauce. Alternatively, you can serve the sauce ladled over a bed of spaghetti. Finish the dish by garnishing with freshly grated Parmesan cheese and a few torn basil leaves.
Tips & Variations
- Enhance the Flavor: For a more complex taste, add a splash of red wine when browning the meat and let it reduce slightly before incorporating the tomatoes.
- Lean Alternative: Use ground turkey instead of beef for a leaner version without sacrificing flavor.
- Boost with Veggies: Add diced bell peppers, mushrooms, or zucchini to the sauce for extra nutrition and texture.
- Spicy Option: Increase the red pepper flakes or include a diced jalapeño during the sautéing process for a spicier kick.
- Make-Ahead: The meat sauce can be prepared in advance and stored in the refrigerator for up to 3 days or frozen for later use. Reheat gently on the stovetop before serving.
Serving Suggestions
Spaghetti with Meat Sauce pairs wonderfully with a variety of sides:
- Garlic Bread: A warm, crusty slice of garlic bread is perfect for mopping up any extra sauce.
- Green Salad: A light salad with a tangy vinaigrette provides a refreshing contrast to the rich pasta.
- Steamed Vegetables: Serve with steamed broccoli or green beans for an extra boost of vitamins.
- Extra Parmesan: Keep a bowl of freshly grated Parmesan cheese on the table for an additional cheesy flavor.
3. Mini Pizza Bagels

Why Mini Pizza Bagels Are So Special
- Quick and Convenient: Using bagels as the base means you get a ready-made, sturdy crust that cooks in just a few minutes.
- Kid-Friendly: Their small, individual size makes them perfect for little hands, and the classic pizza flavors are always a hit with kids.
- Customizable: Whether you prefer classic pepperoni, a veggie medley, or even a breakfast-inspired version with eggs and bacon, you can tailor these mini pizzas to suit your taste.
- Budget-Friendly: Made with everyday ingredients, these mini pizzas offer a tasty meal without stretching your budget.
Ingredients
To make mini pizza bagels, you’ll need:
- 4 mini bagels or 2 regular bagels, halved: Choose your favorite variety—plain, whole wheat, or even sesame.
- 1 cup tomato sauce or pizza sauce: Look for a sauce with a rich, tangy flavor.
- 1-2 cups shredded cheese: Mozzarella is the classic choice, but you can also mix in cheddar or provolone for extra flavor.
- Toppings of your choice: Options include sliced pepperoni, diced bell peppers, olives, mushrooms, or even pineapple.
- Optional seasonings: A pinch of dried oregano or basil to sprinkle on top.
- Olive oil: For a light drizzle (optional).
Step-by-Step Instructions
1. Preheat the Oven:
Preheat your oven to 400°F (200°C). Line a baking sheet with parchment paper or a silicone baking mat for easy cleanup.
2. Prepare the Bagels:
If you’re not using pre-sliced mini bagels, cut your regular bagels in half horizontally. Lay the bagel halves, cut side up, on your prepared baking sheet.
3. Add the Sauce:
Spoon a generous layer of tomato or pizza sauce onto each bagel half, spreading it evenly over the surface.
4. Sprinkle the Cheese:
Top the sauce with a generous handful of shredded cheese. For an extra cheesy bite, feel free to add a little more on top.
5. Customize Your Toppings:
Add your favorite toppings. Whether it’s classic pepperoni slices, a medley of diced bell peppers and olives, or a mix of mushrooms and spinach, arrange your toppings evenly over the cheese. If you like a bit of extra flavor, sprinkle a pinch of dried oregano or basil over the top.
6. Bake:
Place the baking sheet in the preheated oven and bake for 8-10 minutes, or until the cheese is melted, bubbly, and just beginning to turn golden.
7. Serve:
Remove the mini pizza bagels from the oven and let them cool for a minute. Enjoy them warm on their own or with a side of extra pizza sauce for dipping.
Tips & Variations
- Extra Crisp: For a crunchier texture, lightly toast the bagel halves in the oven for 2-3 minutes before adding the sauce and toppings.
- Mix It Up: Experiment with different types of cheese or try a blend for a richer flavor.
- Vegetarian Options: Load up on veggies like diced tomatoes, spinach, or artichokes for a fresh twist.
- Spicy Kick: Add a few red pepper flakes or a drizzle of hot sauce over the top before baking.
- Make-Ahead: Assemble the bagels ahead of time and refrigerate. When you’re ready to eat, bake them directly from the fridge—just add a couple of extra minutes to the baking time.
Serving Suggestions
Mini pizza bagels are versatile and pair well with many sides. Consider serving them with:
- A Light Salad: A crisp green salad with a tangy vinaigrette complements the rich flavors of the mini pizzas.
- Garlic Knots: For an extra indulgent meal, serve them alongside warm garlic knots.
- Veggie Sticks: Fresh carrot or celery sticks can add a refreshing crunch to your meal.
- Extra Dipping Sauce: Offer a side of marinara or ranch dressing for dipping.
4.Taco Salad Bowls
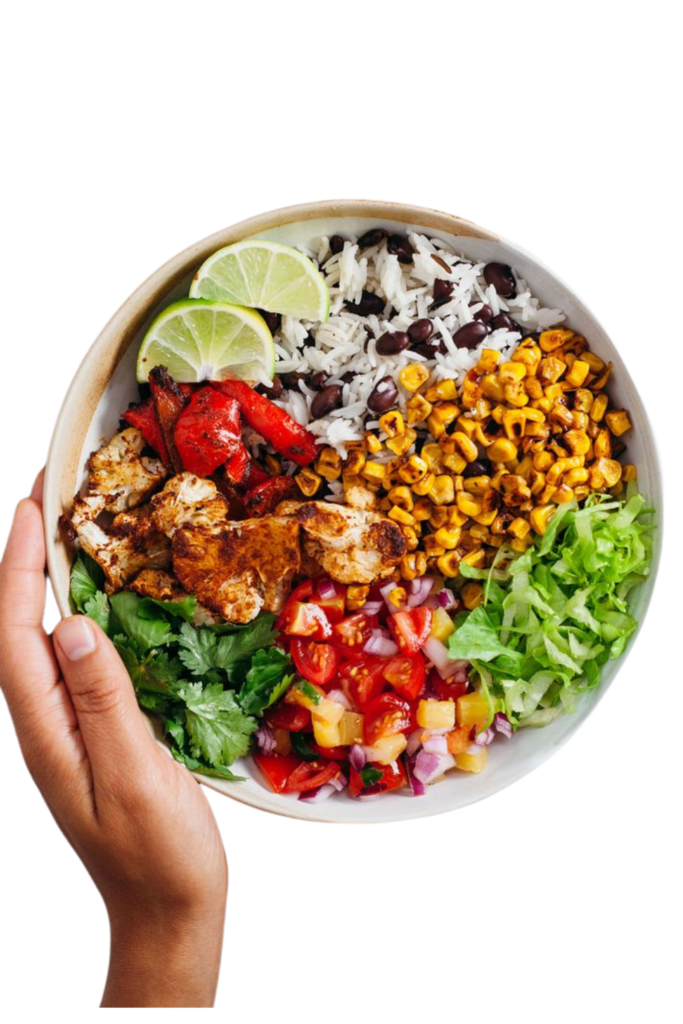
Looking for a dish that’s light, customizable, and quick to prepare? Taco salad bowls check all the boxes! Here’s why they’re a must-try:
- Lighter Option : Ditch the tortillas and swap them for a bed of fresh greens. It’s a great way to enjoy taco night without the carbs.
- Customizable : Pile on your favorite toppings to match your taste buds. Whether you’re team guac or all about the salsa, this dish lets you get creative.
- Quick Prep : Ready in under 30 minutes, taco salad bowls are perfect for busy weeknights when you need dinner on the table fast.
- Kid-Friendly : Kids love building their own bowls, making mealtime fun and interactive—even for picky eaters.
Fun Fact: According to the National Restaurant Association , Mexican-inspired dishes like tacos and burritos rank among the top five ethnic cuisines enjoyed in the U.S. So, you’re not just making dinner—you’re tapping into a national favorite!
Ingredients You’ll Need (Serves 4)
For the Base:
- 4 cups chopped romaine lettuce or mixed greens
- 1 cup cooked ground beef, chicken, or turkey (seasoned with taco seasoning)
- 1 cup black beans, rinsed and drained
- 1 cup corn kernels (fresh, frozen, or canned)
- 1 cup shredded cheese (cheddar, Monterey Jack, or a blend)
For the Toppings:
- 1 medium tomato, diced
- 1/2 cup diced avocado or guacamole
- 1/4 cup sliced black olives
- 1/4 cup sour cream or Greek yogurt
- 1/4 cup salsa or pico de gallo
- Tortilla chips or strips (optional, for crunch)
Pro Tip : Use store-bought taco seasoning for convenience, or make your own by mixing chili powder, cumin, garlic powder, onion powder, paprika, salt, and pepper. It’s fresher and free of preservatives!
Step-by-Step Instructions
Step 1: Prepare Your Protein
- Cook your choice of protein (ground beef, chicken, or turkey) in a skillet over medium heat until fully cooked.
- Stir in taco seasoning and a splash of water, then let it simmer for 2-3 minutes to allow the flavors to meld.
Step 2: Assemble the Bowls
- Start with a base of chopped romaine lettuce or mixed greens in each bowl.
- Add a scoop of your seasoned protein on top of the greens.
- Layer on the black beans, corn, and shredded cheese.
Step 3: Add the Toppings
- Sprinkle diced tomatoes, avocado slices, and black olives over the bowls.
- Drizzle with sour cream or Greek yogurt and salsa or pico de gallo for extra flavor.
- For a satisfying crunch, sprinkle crushed tortilla chips or strips on top.
Step 4: Serve and Enjoy!
- Serve immediately while everything is fresh and vibrant. Let everyone customize their bowl with additional toppings if they’d like.
Tips for Success
- Make It Vegetarian : Swap the meat for sautéed veggies like bell peppers, zucchini, or mushrooms—or use plant-based proteins like tofu or lentils.
- Prep Ahead : Chop veggies and cook the protein in advance to save time during assembly.
- Go Bold : Add jalapeños, hot sauce, or a squeeze of lime juice to kick up the flavor.
Expert Advice : Nutritionist Joy Bauer recommends adding a variety of colorful veggies to salads. Not only does it boost nutrient intake, but it also makes meals more visually appealing—a win-win!
Nutritional Benefits
Taco salad bowls aren’t just delicious—they’re also packed with nutrients:
- Leafy Greens : Romaine lettuce is rich in vitamins A, C, and K, supporting immune health and vision.
- Lean Protein : Ground turkey or chicken provides a low-fat protein option to keep you energized.
- Healthy Fats : Avocado and olive oil-based dressings contribute heart-healthy fats that are good for your body.
- Fiber-Rich : Beans and corn add fiber, keeping you full and satisfied longer.
5. Chicken Alfredo Pasta
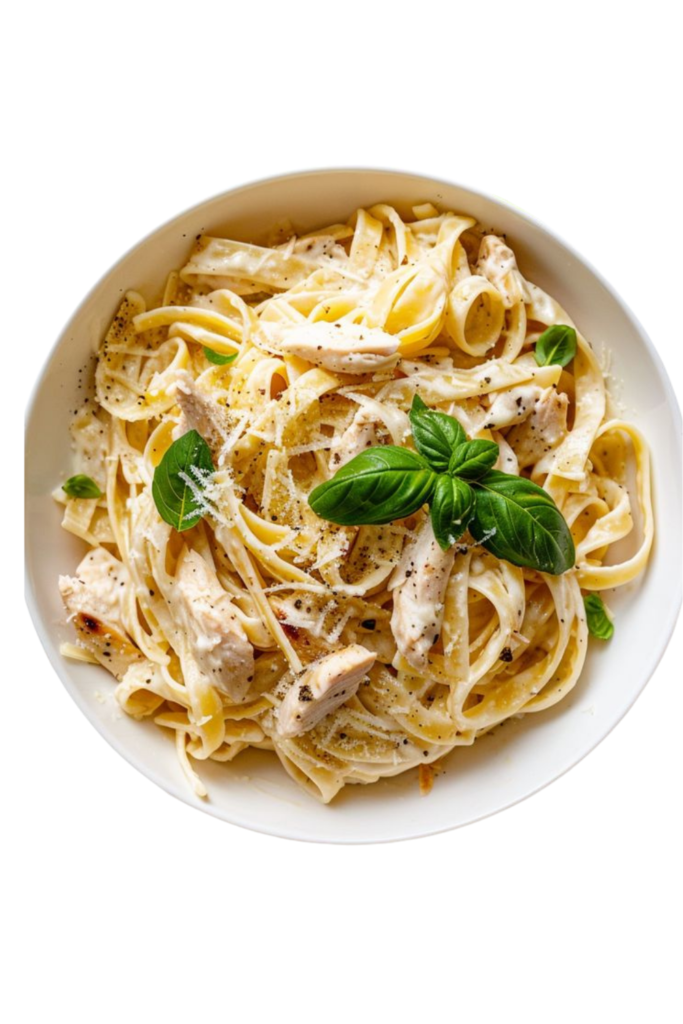
- Comfort Food Classic : With its creamy sauce, tender chicken, and perfectly cooked pasta, it’s a hug in a bowl—what’s not to love?
- Quick and Easy : Ready in under 30 minutes, it’s the ultimate solution for busy weeknights when you need something fast and delicious.
- Versatile : Customize it to your heart’s content! Add veggies, swap proteins, or use gluten-free pasta to suit dietary needs.
- Kid-Friendly : Even the pickiest eaters can’t resist the rich, cheesy goodness of Alfredo sauce.
Fun Fact: According to the National Pasta Association , Americans consume an average of 20 pounds of pasta per person each year—and Chicken Alfredo is one of the most beloved variations!
Ingredients You’ll Need (Serves 4)
For the Pasta:
- 12 oz fettuccine pasta (or your favorite pasta shape)
- 2 cups cooked chicken breast, shredded or diced
- 2 tablespoons olive oil or butter
For the Alfredo Sauce:
- 1/2 cup unsalted butter
- 1 cup heavy cream
- 1 cup grated Parmesan cheese
- 2 cloves garlic, minced
- Salt and pepper to taste
- Optional: A pinch of nutmeg for extra depth
Optional Add-Ins:
- Steamed broccoli florets
- Sautéed mushrooms
- Roasted red peppers
- Fresh spinach
Pro Tip : Use freshly grated Parmesan instead of pre-shredded cheese for a smoother, creamier sauce. Pre-shredded cheese often contains anti-caking agents that can affect texture.
Step-by-Step Instructions
Step 1: Cook the Pasta
- Bring a large pot of salted water to a boil.
- Add the fettuccine and cook according to package instructions until al dente.
- Drain the pasta and toss it with a little olive oil or butter to prevent sticking.
Step 2: Prepare the Alfredo Sauce
- In a large skillet or saucepan, melt the butter over medium heat.
- Add the minced garlic and sauté for 1-2 minutes until fragrant (don’t let it burn).
- Pour in the heavy cream and bring it to a gentle simmer, stirring occasionally.
- Gradually whisk in the grated Parmesan cheese until the sauce is smooth and creamy.
- Season with salt, pepper, and a pinch of nutmeg (optional).
Step 3: Combine Everything
- Add the cooked chicken to the Alfredo sauce and stir to coat it evenly.
- Toss in the cooked pasta and mix everything together until the pasta is well-coated with the sauce.
- If the sauce is too thick, add a splash of reserved pasta water to loosen it up.
Nutritional Benefits
While Chicken Alfredo Pasta is indulgent, there are ways to make it healthier without sacrificing flavor:
- Lean Protein : Chicken breast provides a low-fat protein option to keep you full and energized.
- Calcium-Rich : Parmesan cheese is packed with calcium and adds a savory umami flavor.
- Veggie Boost : Adding spinach, broccoli, or mushrooms increases fiber and nutrients, making the dish more balanced.
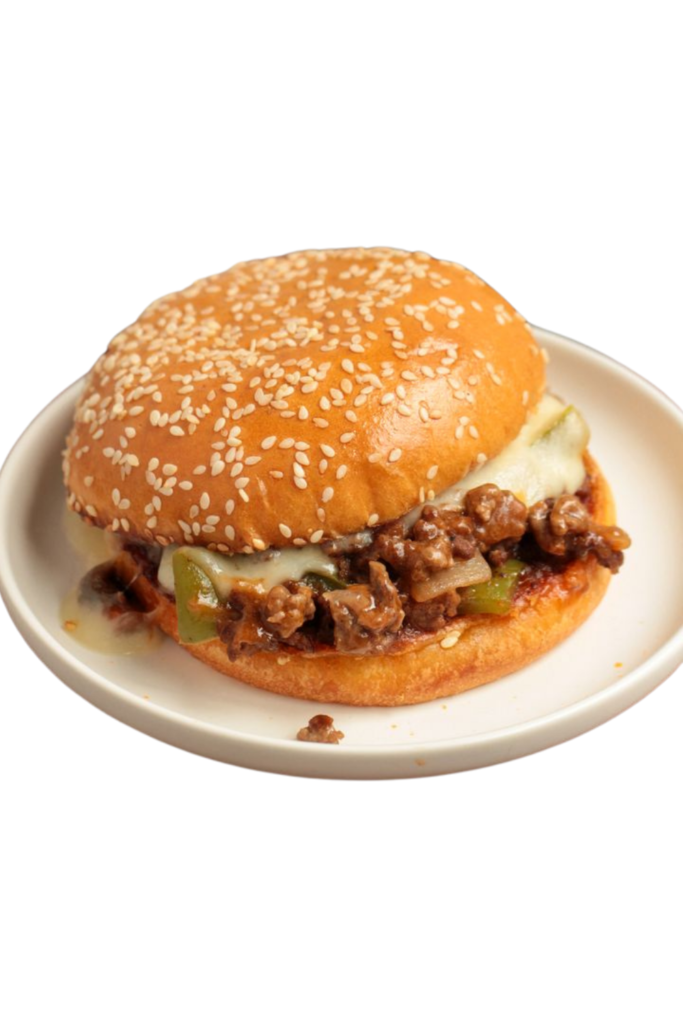
6. Sloppy Joes
Ingredients You’ll Need (Serves 4-6)
For the Sloppy Joe Filling:
- 1 tablespoon olive oil or butter
- 1 medium onion, finely chopped
- 1 bell pepper, diced (optional, for extra flavor)
- 1 pound ground beef (or turkey for a leaner option)
- 2 cloves garlic, minced
- 1/2 cup ketchup
- 2 tablespoons yellow mustard
- 2 tablespoons brown sugar (adjust to taste)
- 1 tablespoon Worcestershire sauce
- 1 teaspoon chili powder (optional, for a little kick)
- 1/2 teaspoon smoked paprika (optional, for depth)
- Salt and pepper to taste
For Serving:
- 4-6 soft hamburger buns
- Optional toppings: pickles, cheese slices, or coleslaw
Pro Tip: Use a mix of ketchup, BBQ sauce, and a splash of apple cider vinegar for a more complex flavor profile.
Step-by-Step Instructions
Step 1: Sauté the Veggies and Beef
- Heat olive oil or butter in a large skillet over medium heat.
- Add the chopped onion and bell pepper (if using) and sauté for 3-4 minutes until softened.
- Add the ground beef and cook until fully browned, breaking it up with a wooden spoon as it cooks.
- Stir in the minced garlic and cook for another minute until fragrant.
Step 2: Make the Sauce
- Reduce the heat to low and stir in the ketchup, mustard, brown sugar, Worcestershire sauce, chili powder, smoked paprika, salt, and pepper.
- Mix everything together until the beef is evenly coated with the sauce.
- Simmer the mixture for 8-10 minutes, stirring occasionally, until the sauce thickens slightly. Taste and adjust seasoning if needed (add more sugar for sweetness or chili powder for spice).
Step 3: Assemble the Sandwiches
- Toast the hamburger buns lightly if desired for added texture.
- Spoon the Sloppy Joe mixture generously onto the bottom half of each bun.
- Top with optional toppings like pickles, cheese slices, or a scoop of coleslaw for extra flair.
Nutritional Benefits
While Sloppy Joes are indulgent, there are ways to make them healthier without sacrificing flavor:
- Lean Protein : Ground turkey or chicken provides a lower-fat alternative to beef.
- Veggie-Packed : Adding onions, peppers, or grated veggies boosts fiber and nutrients.
- Whole Grain Buns : Opt for whole wheat or seeded buns for added fiber and whole grains.
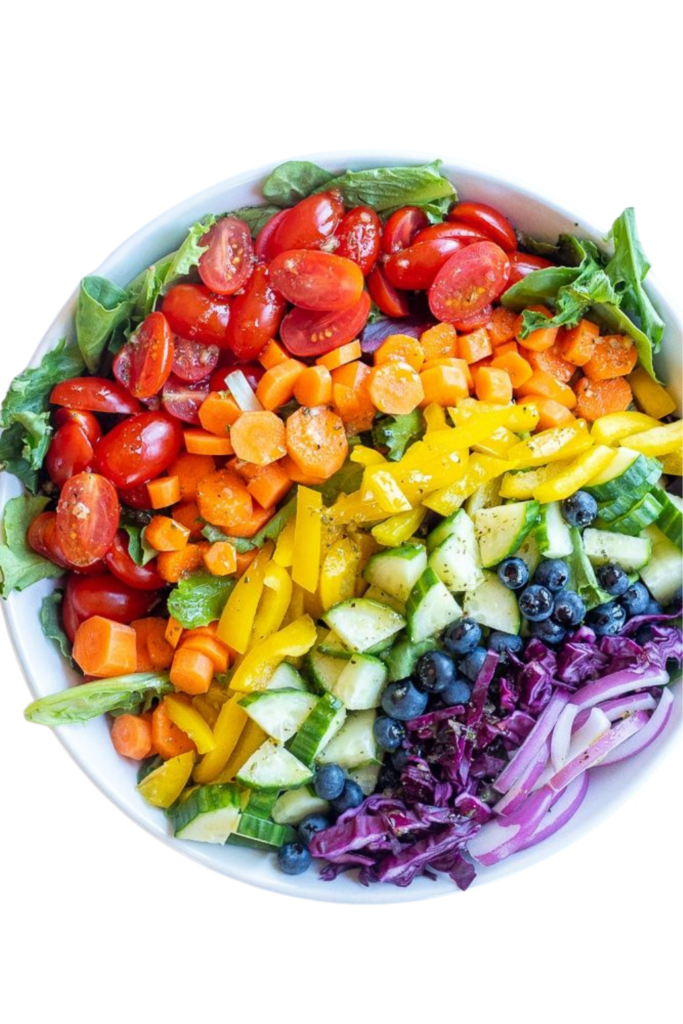
7. Rainbow Veggie Stir-Fry
Step 1: Get Your Ingredients Ready
- Chop the Vegetables : Cut a variety of colorful veggies into bite-sized pieces. Aim for at least 4-5 different types to create a vibrant and nutritious stir-fry. Here are some ideas:
- Red bell pepper
- Orange carrots (julienned or thinly sliced)
- Yellow squash or zucchini
- Green broccoli florets or snap peas
- Purple cabbage or red onion
- Prepare the Sauce : In a small bowl, mix together the following:
- 3 tablespoons soy sauce (or tamari if you’re going gluten-free)
- 1 tablespoon sesame oil
- 1 tablespoon honey or maple syrup
- 1 teaspoon grated ginger
- 2 cloves garlic, minced
- Optional: Add 1 teaspoon sriracha or chili flakes if you like a bit of heat.
Step 2: Cook the Veggies
- Heat 1-2 tablespoons of vegetable oil in a large skillet or wok over medium-high heat.
- Begin with the firmer vegetables, such as carrots and broccoli, and stir-fry them for 2-3 minutes until they start to soften.
- Next, add the softer vegetables like bell peppers, squash, and cabbage. Continue cooking for another 2-3 minutes, stirring often to ensure even cooking and to prevent burning.
Step 3: Add the Sauce
- Pour the prepared sauce evenly over the vegetables in the skillet.
- Stir everything together and cook for an additional 1-2 minutes. The sauce will thicken slightly and coat the veggies, enhancing their flavor.
Step 4: Garnish and Serve
- Once the stir-fry is ready, remove it from the heat. Sprinkle with sesame seeds or chopped green onions for a finishing touch.
- Serve the dish hot, paired with steamed rice, quinoa, or noodles for a filling and balanced meal.
Pro Tip : For extra protein, toss in cooked tofu, shrimp, chicken, or scrambled eggs during the last few minutes of cooking. This makes the dish even heartier and more satisfying!
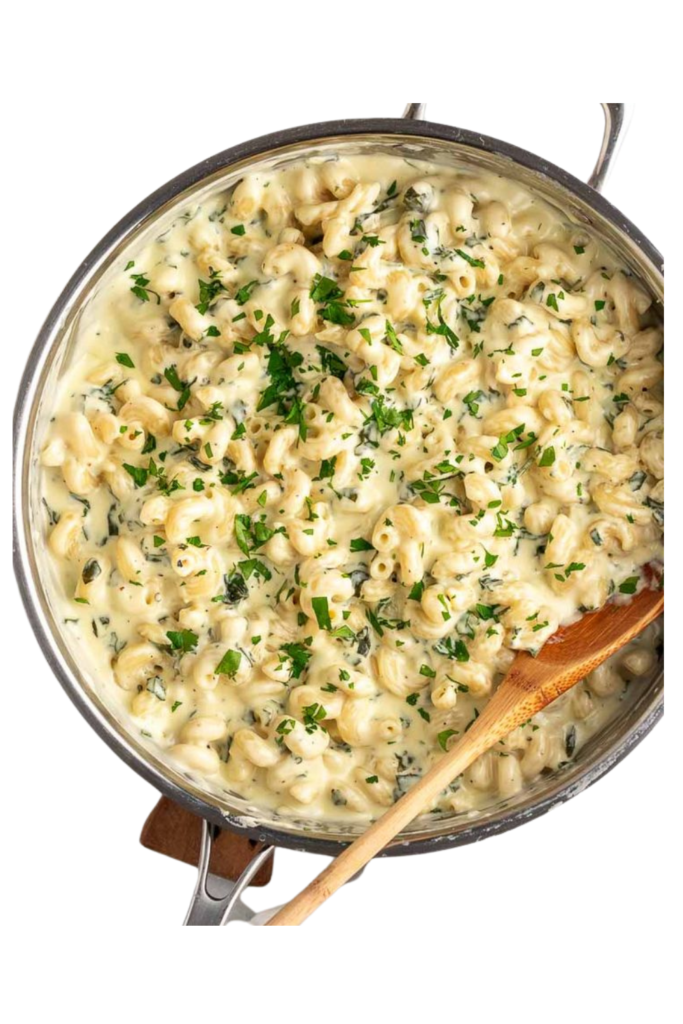
8. Sneaky Spinach Mac & Cheese
Step 1: Cook the Pasta
- Bring a large pot of salted water to a boil.
- Add your favorite macaroni (about 8 oz) and cook according to package instructions until al dente.
- Drain the pasta and set aside, reserving about ½ cup of pasta water for later use.
Step 2: Prepare the Spinach Base
- In a blender or food processor, combine:
- 2 cups fresh spinach (or thawed frozen spinach, squeezed dry)
- 1 cup milk (whole milk or any milk of choice)
- 1 cup shredded cheese (cheddar, Monterey Jack, or a blend)
- ½ cup plain Greek yogurt or cream cheese (for extra creaminess)
- 1 clove garlic (optional, for added flavor)
- Blend until smooth and creamy. This sneaky step hides the spinach while adding nutrients and a vibrant color to the sauce.
Step 3: Make the Sauce
- In a large saucepan, melt 2 tablespoons of butter over medium heat.
- Stir in 2 tablespoons of all-purpose flour to create a roux. Cook for 1-2 minutes, whisking constantly, until lightly golden.
- Gradually pour in the blended spinach mixture, stirring continuously to avoid lumps.
- Add ½ cup grated Parmesan cheese and stir until melted and the sauce is smooth. If the sauce is too thick, thin it out with reserved pasta water, a tablespoon at a time.
Step 4: Combine and Serve
- Add the cooked macaroni to the saucepan and toss to coat the pasta evenly with the cheesy spinach sauce.
- Season with salt, pepper, and a pinch of nutmeg (optional).
- Serve hot, garnished with extra Parmesan or breadcrumbs for a crunchy topping if desired.
9. Grilled Chicken Salad Wraps

Step 1: Prepare the Grilled Chicken
- Marinate the Chicken : In a bowl, whisk together the following ingredients:
- 2 tablespoons olive oil
- 1 tablespoon lemon juice or vinegar
- 1 teaspoon garlic powder
- 1 teaspoon paprika
- Salt and pepper to taste
- Cook the Chicken :
- Heat a grill pan or skillet over medium-high heat. Lightly grease the surface with oil to prevent sticking.
- Grill the chicken for 5-7 minutes per side, or until fully cooked (internal temperature should reach 165°F).
- Remove the chicken from the heat and let it rest for 5 minutes. Slice it into thin strips or bite-sized pieces.
Step 2: Assemble the Salad Filling
- In a large mixing bowl, combine the following:
- 2 cups chopped romaine lettuce or mixed greens
- 1 cup diced veggies (e.g., cherry tomatoes, cucumbers, shredded carrots)
- ¼ cup sliced red onion or shallots
- Optional: Add extras like crumbled feta cheese, sliced avocado, or dried cranberries for added flavor and texture.
- Make the Dressing : In a small jar or bowl, whisk together:
- 3 tablespoons olive oil
- 1 tablespoon balsamic vinegar or lemon juice
- 1 teaspoon Dijon mustard
- 1 teaspoon honey or maple syrup
- Salt and pepper to taste
Step 3: Build the Wraps
- Lay out large flour tortillas or whole wheat wraps on a clean surface.
- Spoon a generous portion of the salad mixture onto each wrap, spreading it evenly across the center.
- Top with the grilled chicken slices and any additional toppings you like, such as extra cheese, nuts, or fresh herbs.
Step 4: Roll and Serve
- Fold the sides of the wrap inward, then roll it up tightly from the bottom to enclose the filling.
- Slice the wraps in half diagonally for easier handling and a more appealing presentation.
- Serve immediately, or wrap them in parchment paper or foil for a portable meal option.
10. Turkey Meatball Sliders

Step 1: Prepare the Turkey Meatballs
- Mix the Ingredients : In a large mixing bowl, combine:
- 1 pound ground turkey (or chicken for a lighter option)
- ½ cup breadcrumbs (or gluten-free alternative)
- ¼ cup grated Parmesan cheese
- 1 large egg
- 2 cloves garlic, minced
- 1 teaspoon Italian seasoning
- ½ teaspoon salt
- ¼ teaspoon black pepper
- Optional: 2 tablespoons chopped fresh parsley or basil for extra flavor
- Form the Meatballs : Use your hands to mix the ingredients until just combined—avoid overmixing. Roll the mixture into small, bite-sized meatballs, about 1–1.5 inches in diameter. You should have around 12–15 meatballs.
- Cook the Meatballs :
- Heat 1–2 tablespoons of olive oil in a large skillet over medium heat.
- Add the meatballs to the skillet and cook for 8–10 minutes, turning occasionally, until golden brown on all sides and cooked through (internal temperature should reach 165°F).
- Alternatively, bake the meatballs in a preheated oven at 400°F for 15–20 minutes on a baking sheet lined with parchment paper.
Step 2: Make the Sauce
- Prepare the Sauce : In the same skillet (if pan-frying) or a separate saucepan, combine:
- 1 cup marinara sauce (store-bought or homemade)
- ½ teaspoon dried oregano
- ½ teaspoon red pepper flakes (optional, for a little heat)
- Salt and pepper to taste
- Simmer the Sauce : Heat the sauce over medium-low heat until warmed through. Add the cooked meatballs to the sauce and toss gently to coat. Let them simmer together for 5 minutes to allow the flavors to meld.
Step 3: Assemble the Sliders
- Prepare the Rolls : Slice small slider buns in half and lightly toast them if desired for added texture.
- Build the Sliders :
- Place one turkey meatball on the bottom half of each slider bun.
- Spoon a little extra sauce over the meatball.
- Top with a slice of mozzarella or provolone cheese (optional).
- Add toppings like fresh basil leaves, spinach, or arugula for a pop of freshness.
- Finish the Sliders : Place the top half of the bun over the assembled sliders. For melty cheese, broil the assembled sliders in the oven for 1–2 minutes until the cheese is bubbly and golden.
Step 4: Serve and Enjoy
- Arrange the sliders on a platter and serve warm.
- Offer additional marinara sauce on the side for dipping, if desired.
- Pair with a side of roasted vegetables, fries, or a simple green salad for a complete meal.
Conclusion: Your Kitchen Is Your Playground
There you have it—10 easy dinner recipes that can turn your everyday mealtime into an exciting culinary adventure! From quick and kid-friendly dishes to healthy heroes, meatless marvels, global flavors, and budget-friendly favorites, there’s a recipe here for every American family. Cooking at home not only nourishes your body but also brings families together, builds lasting skills, and creates wonderful memories.
Remember, every time you try a new recipe, you’re one step closer to becoming a true kitchen hero. Don’t be afraid to experiment, tweak the ingredients, and have fun along the way. We’d love to hear about your cooking adventures—share your favorite recipes and tips in the comments below!
Frequently Asked Questions (FAQs)
Q1: Are these recipes beginner-friendly?
A: Yes! Each recipe includes simple, step-by-step instructions and uses common ingredients, making them perfect for cooking beginners—even 6th graders with a little supervision.
Q2: Can I modify these recipes to accommodate dietary restrictions?
A: Absolutely. You can substitute ingredients such as using non-dairy products, gluten-free pasta, or extra veggies to suit your dietary needs and preferences.
Q3: How can I save time during busy weeknights?
A: Try one-pot recipes, prepare ingredients in advance, and repurpose leftovers. Many of these recipes can be ready in 30 minutes or less.
Q4: What should I do if I’m missing an ingredient?
A: Feel free to substitute what you have on hand—use yogurt instead of sour cream or canned tomatoes if fresh ones aren’t available. Experimentation is part of the fun!
Q5: How can I involve my kids in cooking safely?
A: Let them help with tasks like stirring, washing vegetables, or setting the table. Always supervise any knife work or stove usage, ensuring a safe and enjoyable cooking experience for everyone.